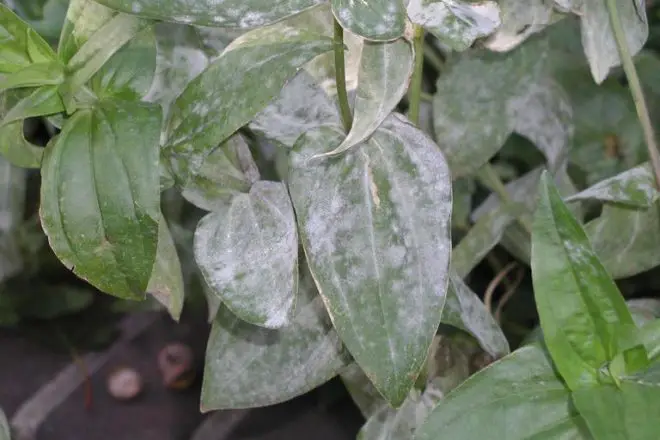
Mildew can be a persistent headache for gardeners, particularly during those sweltering, humid months.
This unsightly fungal growth, showing up as a white or gray powder on your plants’ leaves and stems, can weaken your plants and stunt their growth. If you don’t act swiftly, mildew can spread rapidly, compromising the health and beauty of your entire garden.
But fear not—there’s no need for costly fungicides or hours of labor. I’ve got a fantastic, time-tested trick from my grandma that will rid your garden of mildew in just two minutes, with almost no effort. Here’s how to harness the power of baking soda to save your plants.

The Secret Weapon: Baking Soda
You might already have it in your pantry, and it’s not just for baking! Baking soda, or sodium bicarbonate, doubles as a natural fungicide.
When used correctly, it can create an environment on your plant leaves that’s inhospitable to mildew. This simple household item is the key to keeping your garden mildew-free.
Why Baking Soda is Your Best Ally
Mildew thrives in slightly acidic conditions, but baking soda has an alkaline pH of about 8.3. By creating a more alkaline environment, baking soda neutralizes the acidic conditions that mildew loves.
This pH shift disrupts mildew’s growth, effectively stopping it in its tracks and promoting healthier plants.

The 2-Minute, No-Fuss Method
What You’ll Need:
- 1 tablespoon of baking soda: Your mildew-fighting superstar.
- 1 teaspoon of liquid dish soap: Optional, but it helps the solution stick to the plant leaves better.
- 1 gallon of water: To mix with the baking soda and create your solution.
- A spray bottle or garden sprayer: For applying the solution to your plants.
Instructions:
- Mix the Solution: In a large container, combine 1 tablespoon of baking soda with 1 gallon of water. Stir well until the baking soda is completely dissolved. If you’re using liquid dish soap, add 1 teaspoon to the mix and stir again. The soap helps the solution adhere to the leaves more effectively.
- Prepare Your Spray Bottle: Transfer the solution into a clean spray bottle or garden sprayer. Make sure your bottle is free of any residue from previous uses to avoid any potential chemical reactions.
- Apply to Affected Plants: Lightly mist the solution onto the plants suffering from mildew. Focus on the leaves, especially the undersides where mildew often begins. A gentle, even coating is all that’s needed—no need to soak your plants. The entire process should only take about two minutes, even if you have a sizable garden.
- Reapply as Needed: Depending on the extent of the mildew infestation, you may need to reapply the solution every few days. However, many gardeners find that just one or two applications are enough to see significant improvement.

Tips for Optimal Results:
- Apply During Cooler Times: For best results, apply the solution in the early morning or late afternoon. This timing helps prevent the solution from evaporating too quickly under the hot midday sun, allowing it to work more effectively.
- Watch Your Watering Habits: Mildew loves moist conditions. To avoid creating a damp environment that fosters mildew growth, water the base of your plants rather than the leaves. Ensure good air circulation around your plants to keep the foliage dry.
- Do a Test Run: If you’re worried about potential damage to your plants, test the baking soda solution on a small, inconspicuous area first. Wait 24 hours to see if there’s any adverse reaction. If all looks good, proceed with applying it to the rest of your plants.
Why This Trick is So Effective
The beauty of using baking soda lies in its simplicity and accessibility. Unlike many commercial fungicides that can be pricey and packed with chemicals, baking soda is natural, affordable, and safe for use around children and pets.
Additionally, it’s environmentally friendly, posing no threat to beneficial insects or pollinators in your garden.
My grandma used this method for decades, and it never let her down. From her cherished roses to her vegetable patch, baking soda was always her go-to solution for battling mildew.
Now, I’m passing this tried-and-true wisdom on to you. With just a few minutes of your time and a little baking soda, you can keep your garden thriving and mildew-free.
So, the next time you spot that telltale white powder, remember this simple and effective remedy. Your garden will be healthier, happier, and free from mildew with minimal effort on your part. Happy gardening!


